Pesco 280 Power Pack: A Close Look
Attention: Welcome to our new aircraft hydraulics section! We hope you find this section we have put together informative and interesting. You may notice that some part numbers and so forth are blurred out. One reason we didn't want to post full part numbers because it has taken us months of searches to get the information we have. It wouldn't be fair to us to just give up our hard work and research. Not too many people know about this stuff and the ones that do don't want to talk about it. We feel this is just the right amount of info so we don't upset anyone on either side. The biggest reason for not giving out full part numbers is because we don't need every lowrider to call up aircraft surplus places looking for things. Most warehouses don't want to sell to lowriders and the ones that do are raising their prices beyond a reasonable amount because people are willing to pay to much for stuff the warehouse considers junk. Lets keep prices down and think about it before you offer a insane amount for a used pump that needs a rebuild. If you are going to track parts down don't say that it is for a lowrider. Know what the full part number is, what aircraft it goes in, the proper name for the part and the function of that part. Take the time to research the surplus industry and know the lingo they use. Remember not to use lowrider lingo when talking with them because odds are they have a different term for the part you are looking for. With a little research and some luck you'll be able to find what you need.
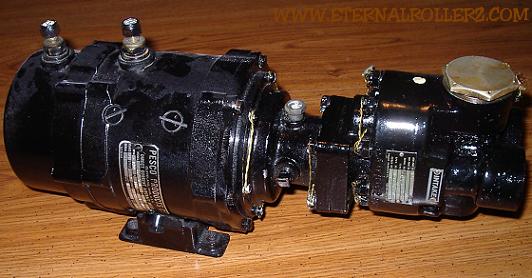
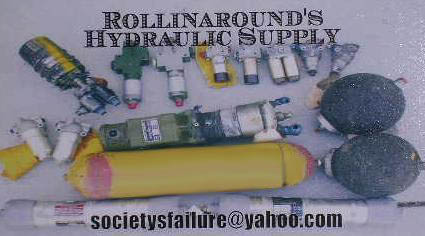
The 280 is a very reliable pump for lowriders. In lowrider circles it is sometimes called a "Screaming Mimi". It is bigger than the popular 777 unit. The motor on a 280 unit is around 3 HP and the pump output pressure is around 1400 PSI. The Pesco 280 is a good pump for a two pump system. Not too long ago we were lucky enough after hours of searching through part numbers to track down four brand new units that have been in storage since 1944. They were in good shape but being in storage that long had aged the pumps so they were cleaned up. We've seen some of these units on Ebay but be careful as they may not be tested. We highly recommend getting your pumps from ROLLINAROUND'S Hydraulic Supply, all pumps are checked over and motors are tested..
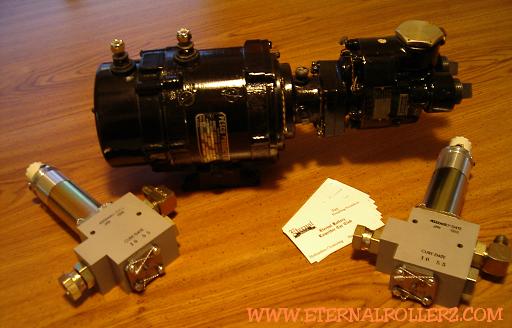
Above: A never used surplus Pesco 280 hydraulic pump and motor.
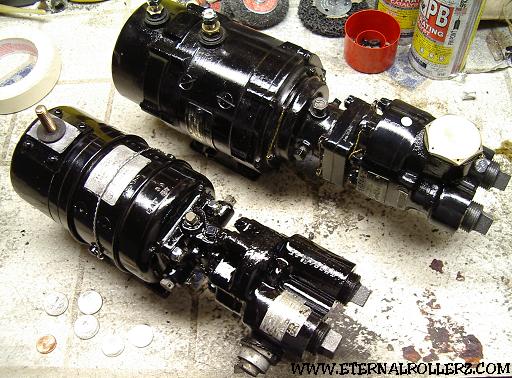
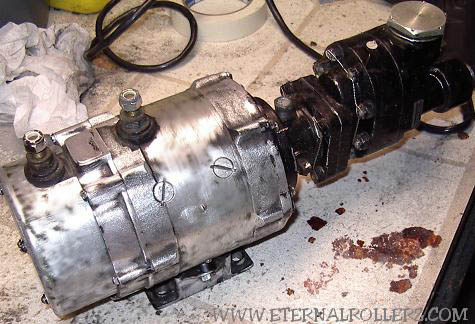
Above: The Pesco 280 is larger than the Pesco 777 unit.
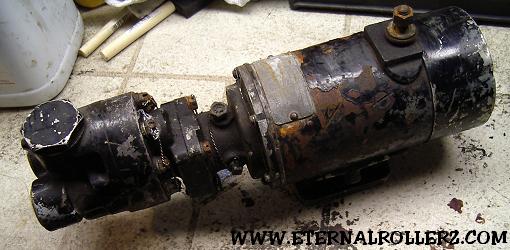
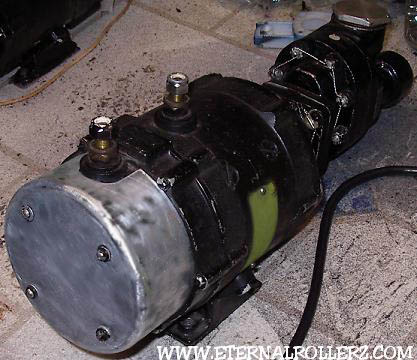
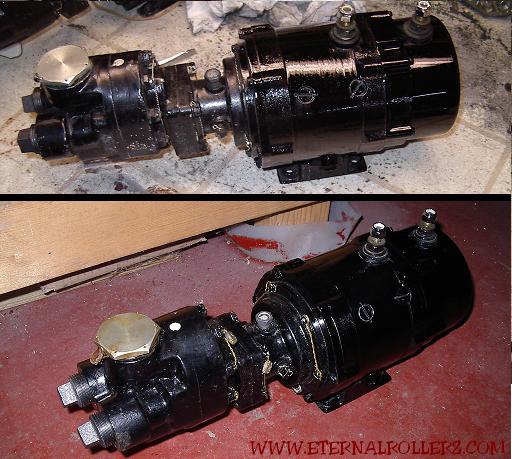
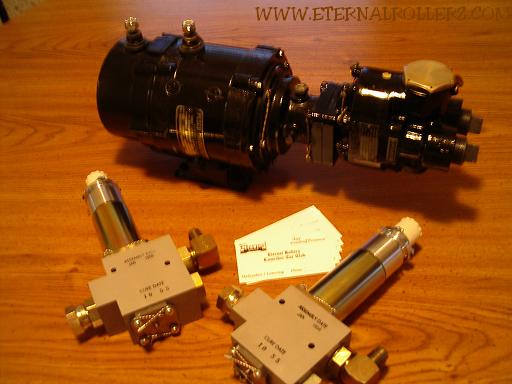
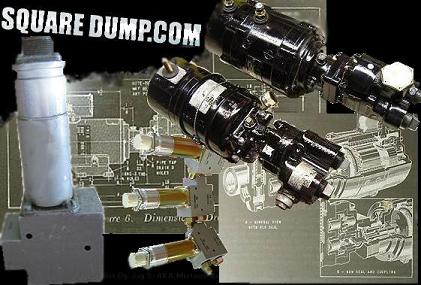
Above: A used Pesco 280 with a Leece Neville DC motor.
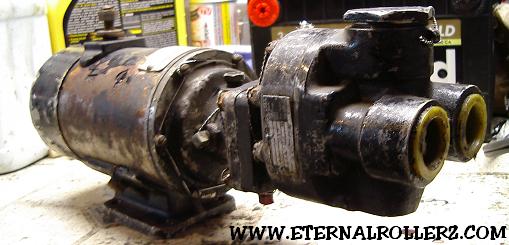
Above: Here is another angle of the used Pesco 280.
Pesco 280 Power Pack: Useful Information
We will have more in this section soon. We will cover setting the relief on the pumps and a overhaul in the near future on a used unit. Also we hope to have some more parts diagrams in the near future to share with you.
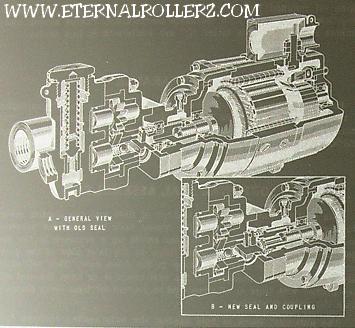
Above: A Cut away diagram of a Pesco 280 unit.

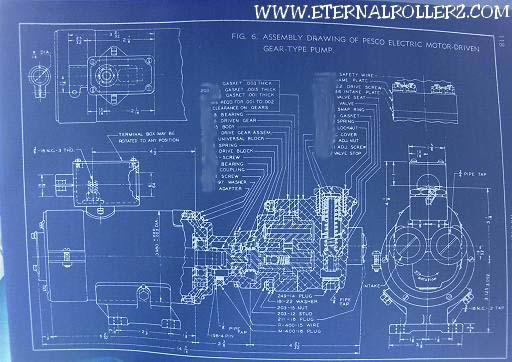
Above: Overhaul instructions for a Pesco 280 gear unit.
![]()
Above: Tolerances inside a Pesco 280 gear unit.
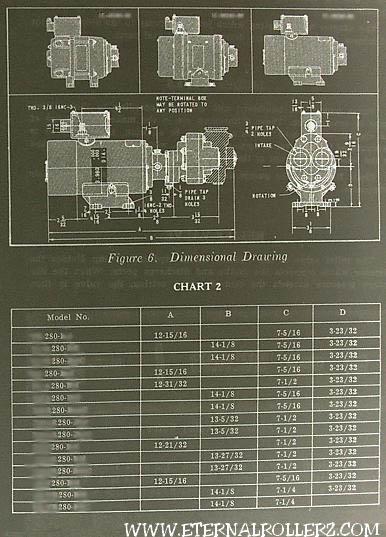
Above: Here are the measurements for different Pesco 280 power packs.
Above: Here is another page of measurements a Pesco 280 power pack.
New Pesco 280 Power Pack: Clean Up
This section covers the clean up of four brand new units we got from surplus storage. We didn't take the pumps apart except to check the motor bushes because we didn't want to take apart and possibly mess up a good working unit. Soon we will show a overhaul of a used unit.
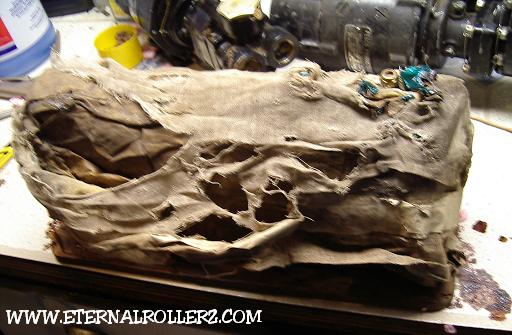
Above: Here is how the pumps came. They were not in their original crates because the wood had long deteriorated.

Above: Under the burlap cover was the unit with the pump end wrapped with some sort of insulation. We hope it isn't what we thought the insulation is!
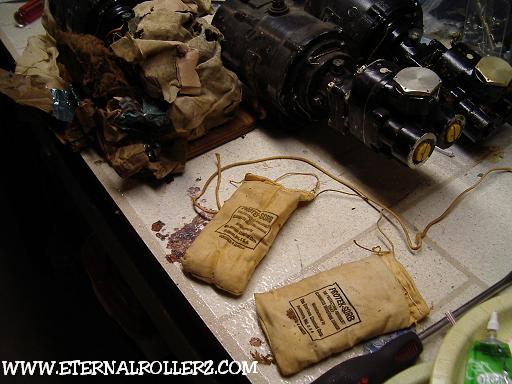
Above: On each unit a dry pack was secured to the pump to protect it from moisture in storage.
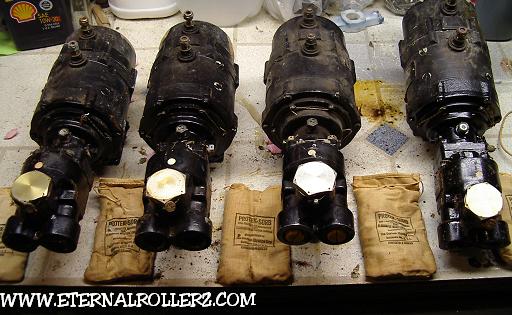
Above: Here are the pumps right out the the packaging.
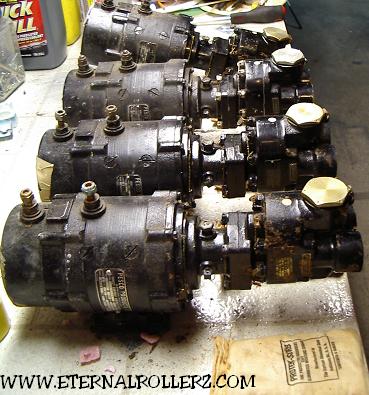
Above: Here are some more pictures of the pumps right out the the packaging.
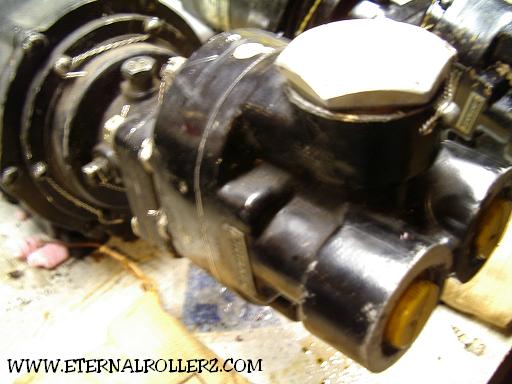
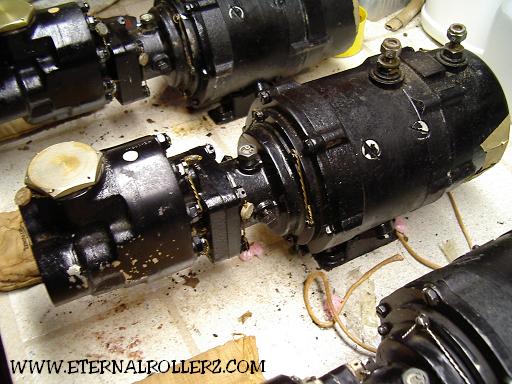
Above: A close up of one of the pumps.
Above: Here is a unit after a quick cleaning, you can see that some of the paint is chipped and flaking.
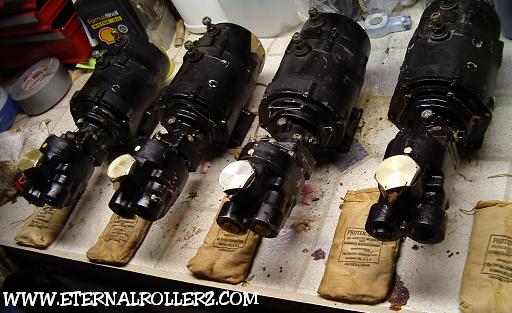
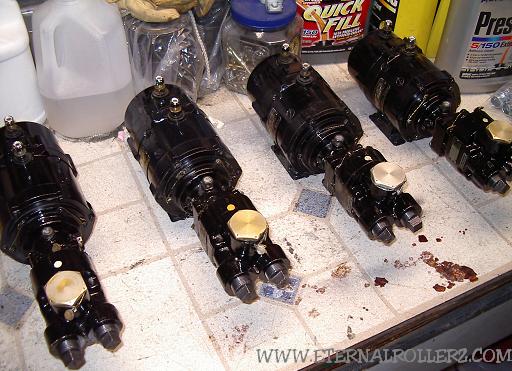
Above: Here they all are after the quick cleaning.
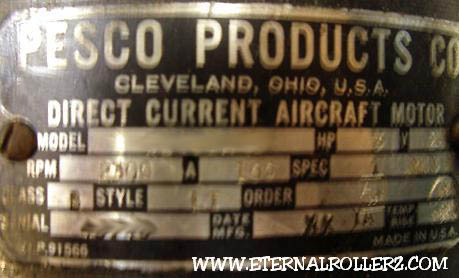
Above: A close up of the plate. The plate was photo shopped to remove part numbers. Sorry guys it took us too long to figure out everything on our own. We will be happy to get you going in the right directing if you ask us though.
Above: First the motor end plate was removed in the motor was inspected. The model number plates were removed to prevent damage. After getting a good bill of health the end cap was wire brushed and sanded to remove any loose paint.
Above: Then the stator case of the motor was sanded down and prepped for paint.
Above: The motor was painted and the pump was touched up because we wanted the pump to look original.
Above: Here is the pump with clear coat over the original finish.
Above: Here are the units cleaned up.
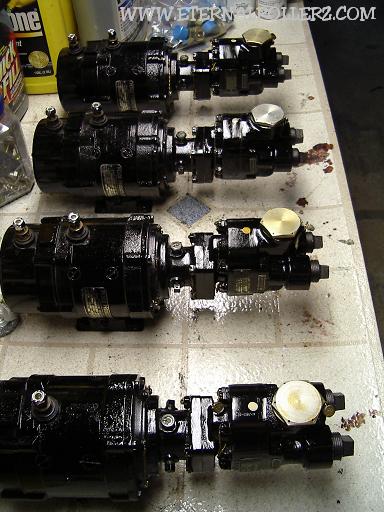
Above: Another view of the finished units.
Above: A finished unit with two square dumps.
Above: The unit looks brand new and has the plates and markings intact.
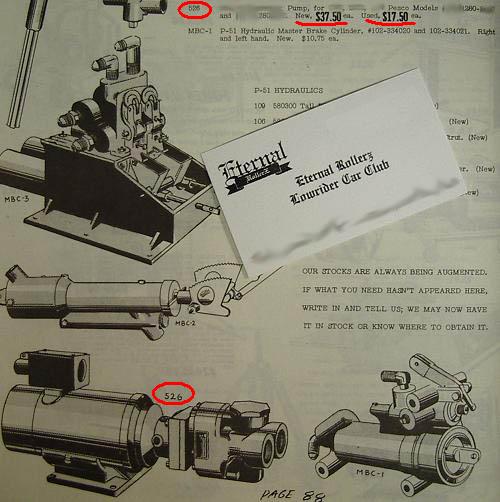
Above: Here is a Pesco 280 Power pack in a 1949 Catalog from Palley Supply Co.
Used Pesco 280 Pump: Up Close
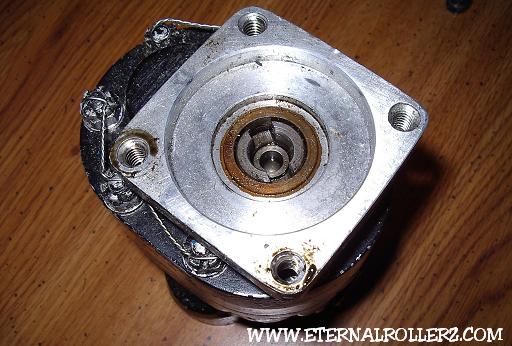
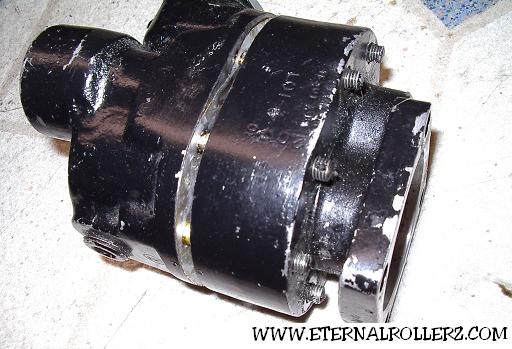
Above: Here is the pump on the shaft side. You can see that the pump is threaded for bolts that attach the pump to the motor flange.
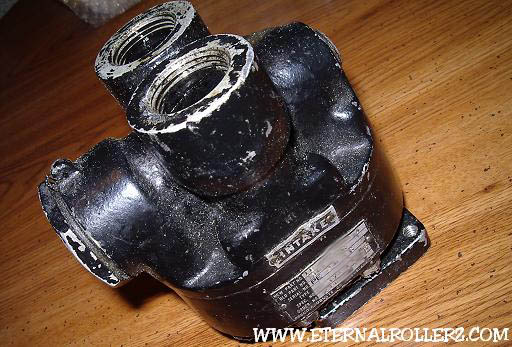
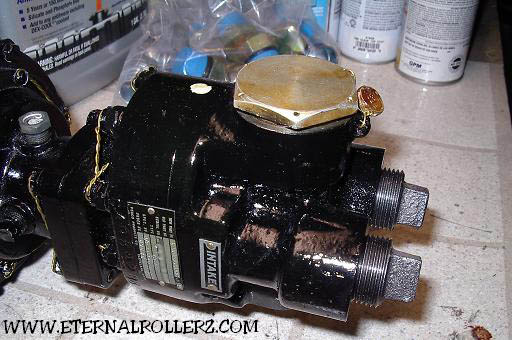
Above: Here you can see the data plate and intake plate.
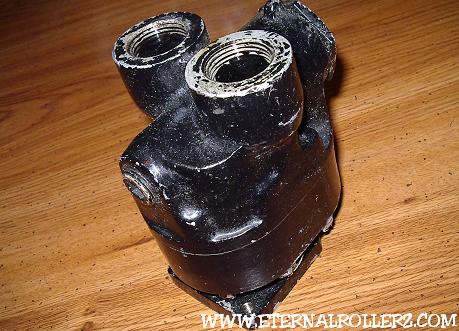
Above: From this angle you can see the pressure relief set screw.
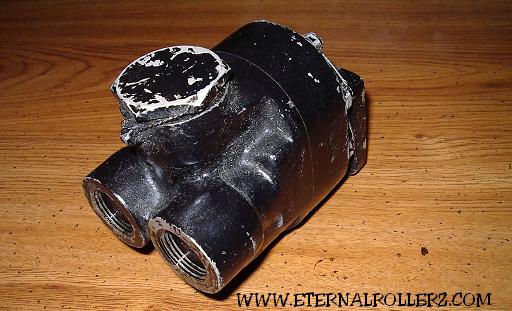
Above: This pump will be inspected and cleaned up.
Used Pesco 280 Pump: A Look Inside
Warning: Do Not Take Your Pesco Pump Apart As It May Cause A Problem In The Pump!
This section is for educational purposes to explain the inner workings of these pumps.
Below we are going to take a Pesco pump apart for inspection. Pesco pumps are a gear pump so they are fairly simple in how they operate. You'll need a few simple tools to take the pump apart. You will need wire cutters, needle nose pliers and a 7/16 open end wrench.

Above: The lock wires are cut on the eight castle nuts on the back of the pump.
Above: You will notice that you can't back some of the nuts around the flange off because the studs are too long. Carefully pull apart the front half and back half of the pump and you'll be able to get the nuts off. Be careful not to damage the aluminum gasket in between where you take the pump apart.
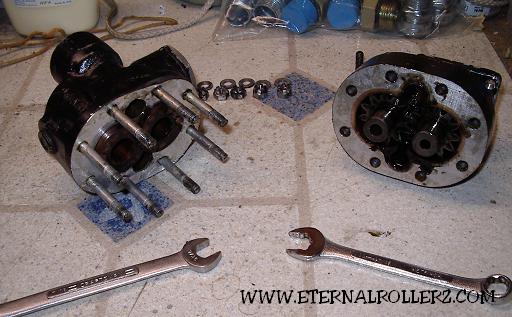
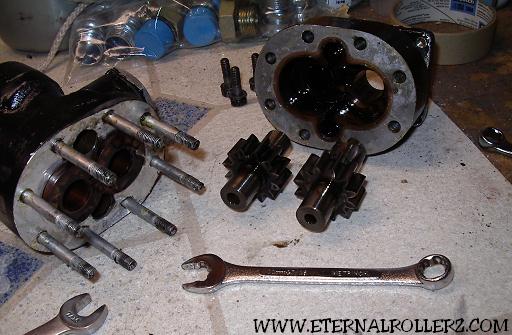
Above: Here is the two halves of the pump apart.
Above: You can see that this pump is very similar to a Fenner pump inside. It works on the same principle as modern pumps. Notice the clover leaf walls appear to be copper.
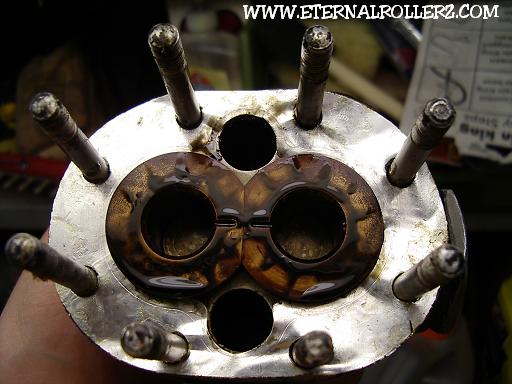
Above: The front half of the pump with the aluminum gasket still intact. Notice the lack of roller bearings, this pump uses friction bearings.
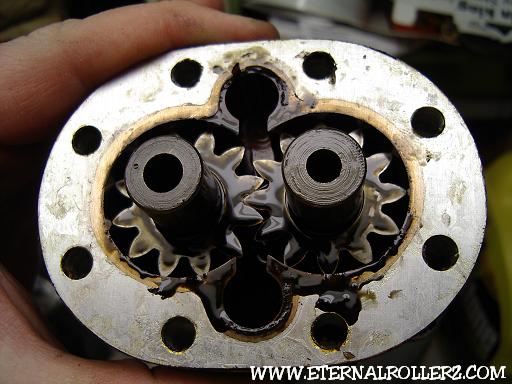
Above: Here is the pump with the gears out. The gears slide right out with your fingers.
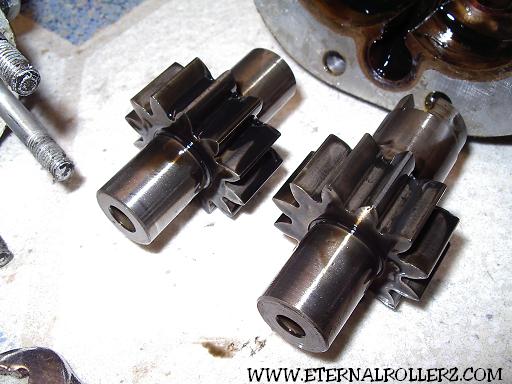
Above: Close up of the idler and drive gear.
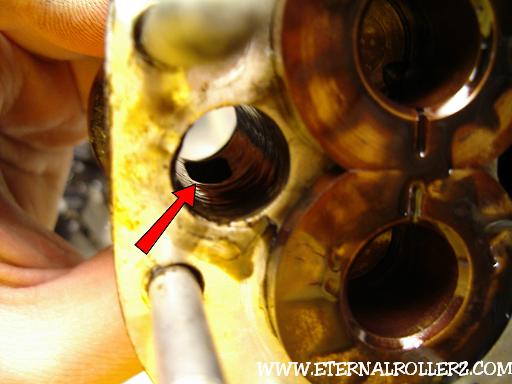
Above: One the outlet port there is a hole for the pressure relief for fluid to go in case of the excess pressure.
More Information & Resources
Service, Repair & Custom Work:
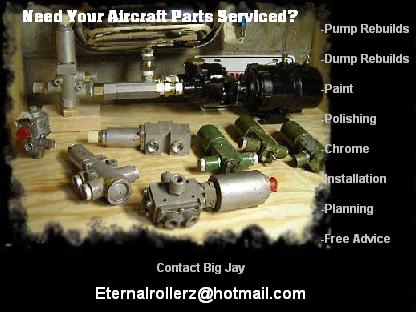
Aircraft Parts Sales:
More Educational Information:
All Photographs and Art Copyright
© 1998-2005 Eternal Rollerz C.C.
Website Design Copyright © 1998-2005 Webmaster