Continental Kit Mod.
We wanted to share some info on doing a continental kit with a wire wheel installed. One very popular kit to modify is from E&G Classic. These kits came on various cars during the 70's and 80's as a dealer add on. Towncar, Deville, Seville, New Yorker, 5th Avenue and many other luxury car models came with the kits on them. This section covers the E&G model only but it may be helpful as other kits are similar. To make things easier to understand we broke this tech article into steps to follow. The kit in this article is a new E&G kit and you may notice that the latch is different on older kits. This is a very difficult and time consuming job. If you are still unsure about this after reading the article we HIGHLY recommend sending your kit out to someone who does. It's worth sending it out.
Note: If you enjoy this article let us know in our guestbook. We'd love to hear your feedback.
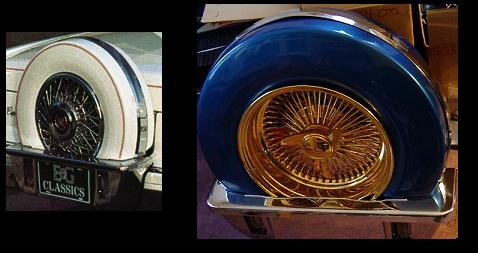
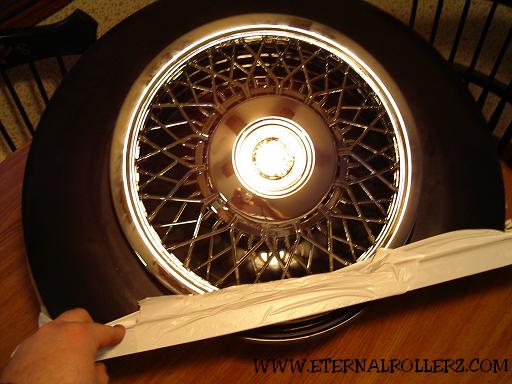
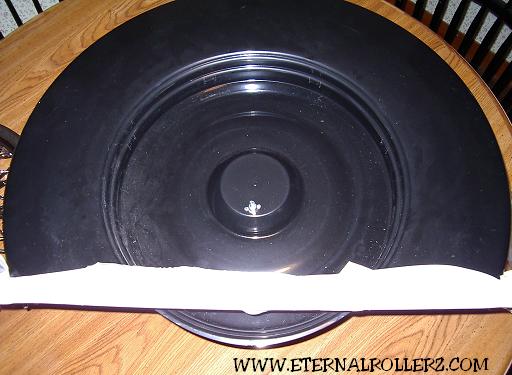
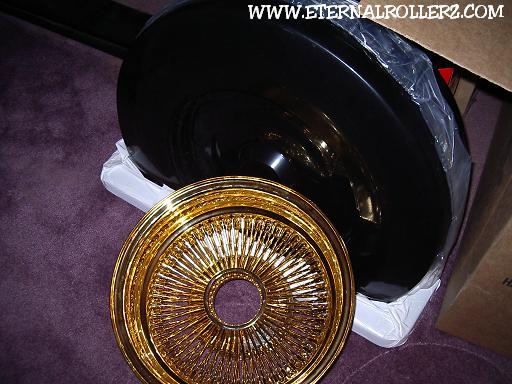
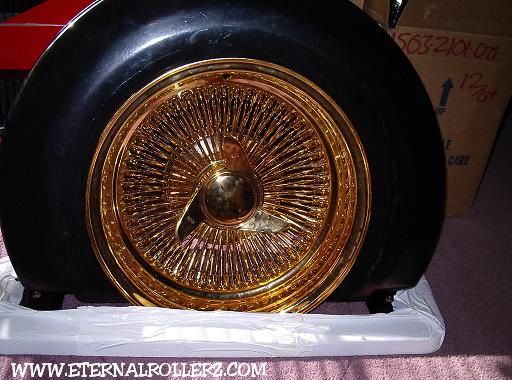
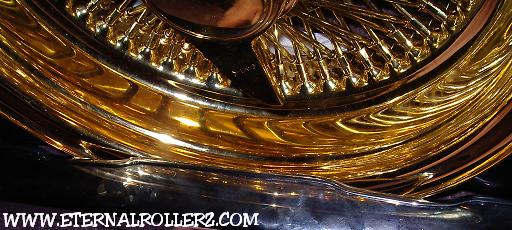
Above: A stock spare kit on left and a modified kit with rim on the right.
What you'll need:
E&G Classic spare kit
Reciprocating saw
Various sockets and wrenches
Welder
Drill and various bits
14x6 rim!!!!! ( Some older kits may fit a 13 inch rim )
Various grade 8 hardware
Cheap soldering iron
Tape measure
Flathead screwdriver
Dremel tool with cutting wheels
Grinder
1/4" x 2" x 4' steel flat bar stock
1/4" x 1" x 4' steel flat bar stock
Reference
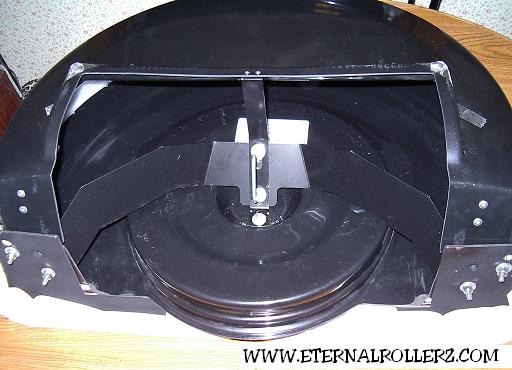
First we'll take a look at a E&G Classic bumper kit before and work has started. This will be helpful once the kit has been taken apart as a picture reference.
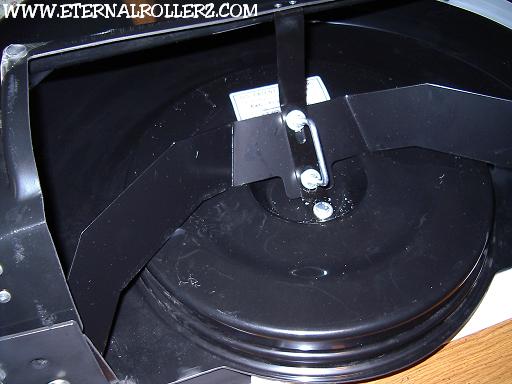
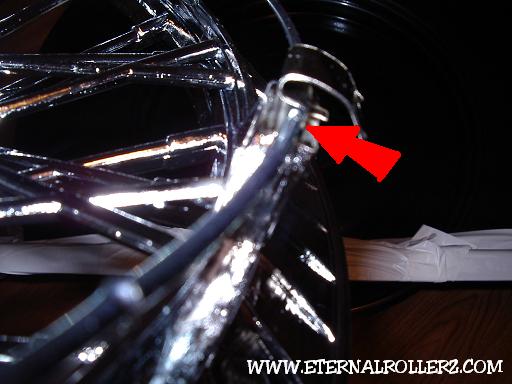
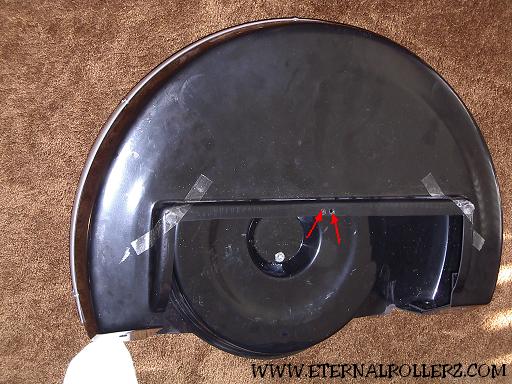
Above: Here is the stock latch bracket inside the top shell.
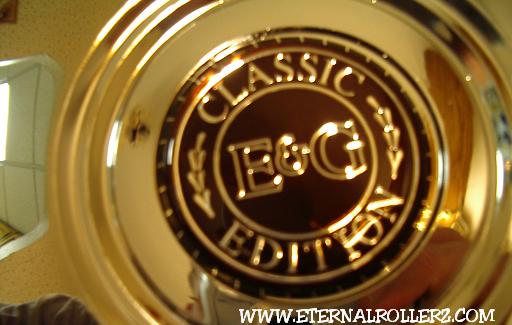
Above: A genuine E&G Classic spare kit will have a sticker inside the shell with their name on it.
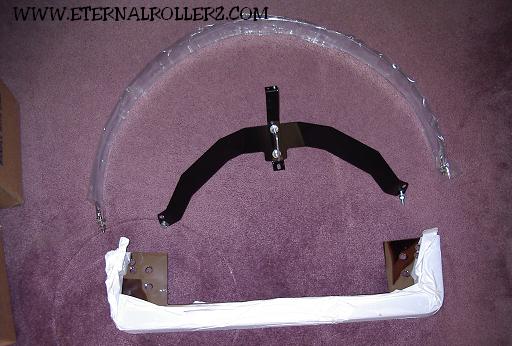
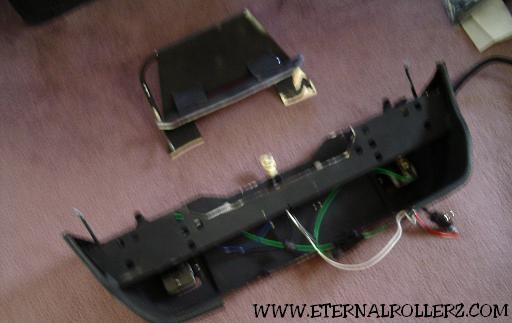
Above: Here is the stock lower latch and bottom bucket of the spare kit.
Above: Here is a better view of the latch.
Above: The bottom bucket.
STEP 1 : Removing The Wheel Cover
The first step is to remove the stock cover from the top shell of the kit. It comes out very easily once you understand how it comes off. You will need a flat head screwdriver to remove the cover.
Above: Some E&G kits will have the logo on the center of the wheel cover.

Above: Using the screwdriver gently pry the metal ring out of place where it puts tension on the tabs that hold the cover on the top shell.
Above: Once the tension ring has been moved off the tabs the cover will lift right out of the top shell.
Above: Here you can see where the ring sits on the tabs of the wheel cover.
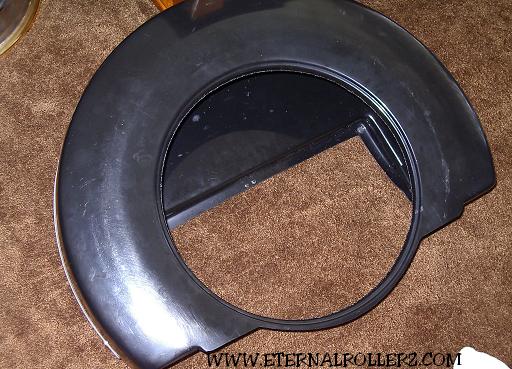
Above: Here is the top shell without the wheel cover.
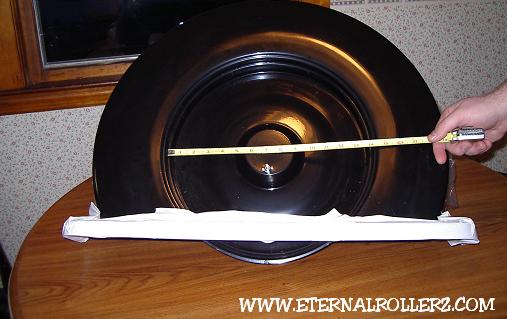
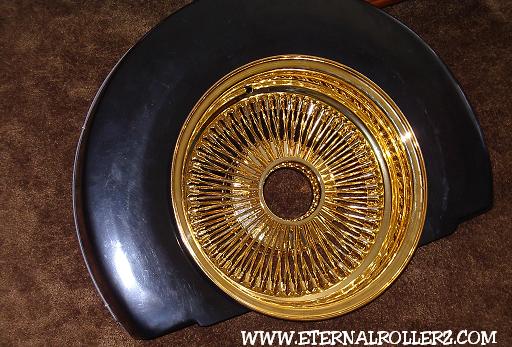
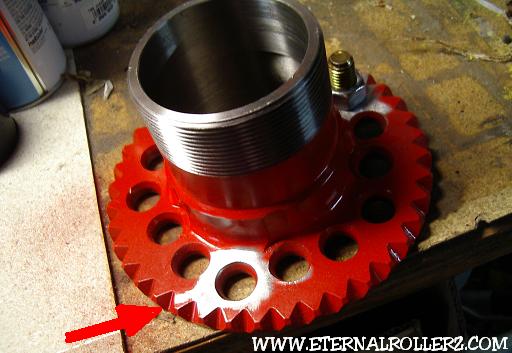
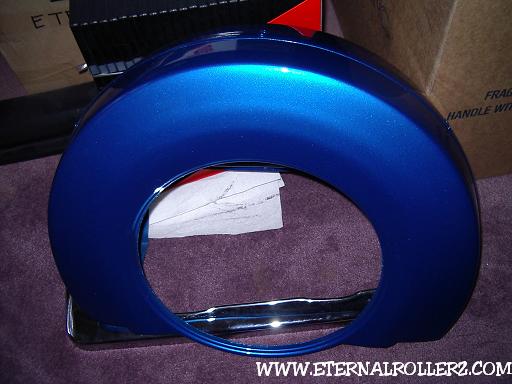
Above: Time to check what size rim will fit in the kit.
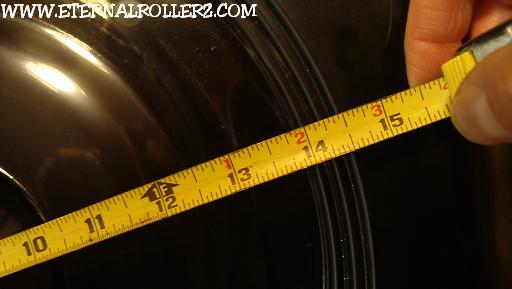
Above: ONLY a 14x6 will fit this kit correctly.
STEP 2: Cutting The Rim
This step was probably the most painful step to do. It wasn't hard to do but it was sad to cut a brand new all gold 14x6 for this kit. You need a drill and a reciprocating saw to cut the back of the rim off. Using the drill make a hole that will allow you to put the saw blade near the back rim nipples. With the saw cut next to the back rim nipples all the way around the rim. You could also use a grinder or cutting wheel to cut the rim. Once the rim is cut clean up the cut part of the rim and apply some paint to prevent rust on the cut edge.

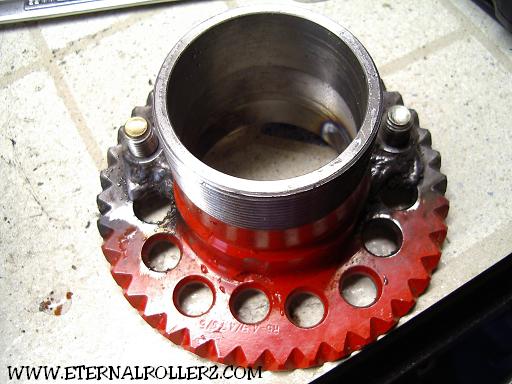
Above: Here is a cut rim ready to go in the kit.
Above: A cut rim with the top shell of the kit.
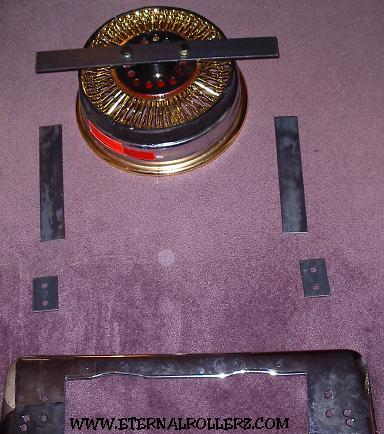
STEP 3: Removing The Stock Latch and Brackets
Now we will begin to prep the top shell to make room for the rim. You will need some various sockets and a drill to remove some rivets. You will remove the top chrome band, the upper latch bracket and the chrome base from the top shell.
Above: The arrows show where you must drill out the rivets.
Above: Here is everything you will remove in this step.
STEP 4: Cutting the Hole For The Rim
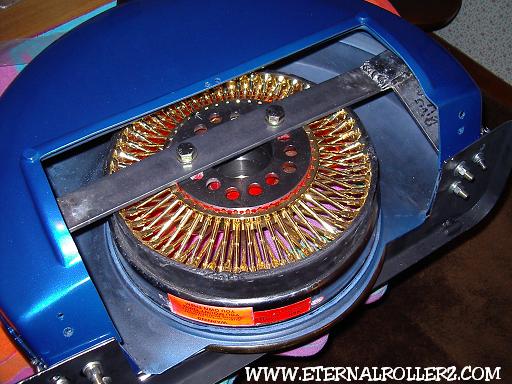
You were probably wondering what you will use the soldering iron for? We used one with a flat tip to cut the hole for the rim. It made a very clean hole to put the rim through. After the hole was cut out we dropped in the rim to check how it fit in the top shell. We put the rim exactly how we wanted it, with the valve stem hole on top. Then we put in the adapter and spinner and set the spinner up how we wanted it. A mark was made with a marker on the rim and adapter to make setting it up exactly how you want it easy to do. Another mark was made across the adapter for the rim mounting bar that we have not made yet.
Above: The hole is cut in the top shell with a flat tip soldering iron.
Above: The rim is dropped into the top shell to check for fit.
Above: The back side is checked out for fit, then the adapter and spinner are put in the rim.

Above: After you figure out exactly how you want the spinner in the kit, mark the rim and adapter so it will go in the same spot when you put it together later on.
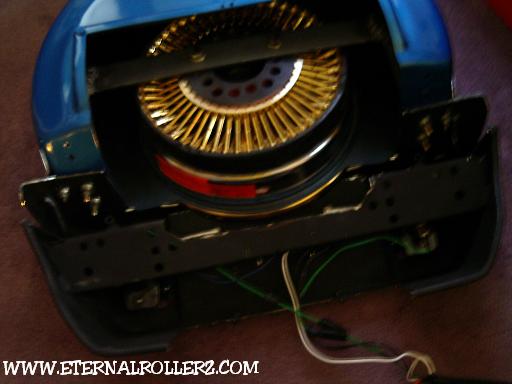
Above: This is how it will be setup when it is complete.
STEP 5: Modifying The Rim Adapter
Now the adapter will need to be modified a bit. We like to weld nuts to the adapter for better quality. This prevents nuts from backing off the bolts that hold the rim in. Imagine having to take the whole kit apart again because the rim got loose.
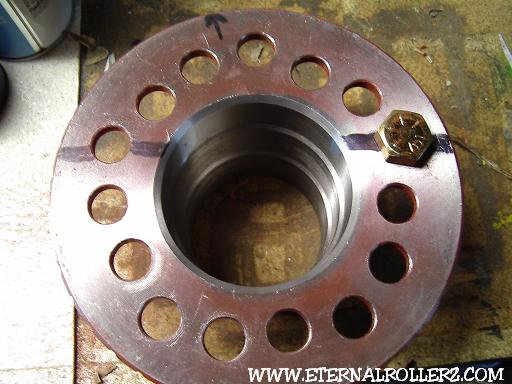
Above: A line marks where the support bar for the rim will go.
Above: The paint is removed where we will weld the nuts in place.
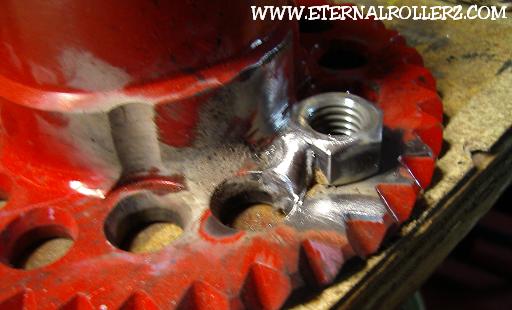
Above: The nut is spot welded onto the adapter and then checked.
Above: The welds are finished off and are strong now. When welding make sure to avoid the outside edge with the teeth on the adapter.
STEP 6: Notching Bucket Top
The bucket top is the piece that was bolted to your top shell. When you put the rim in the kit the bucket top must be modified to fit the lip of the rim. This modification can be done with a Dremel tool. Once you have made the cut you can put back the door edge molding over the cut part of the bucket top.
Above: The top of the bucket showing where to notch it out for the rim.
Above: Here you can see how the bucket top now sits into the rim.
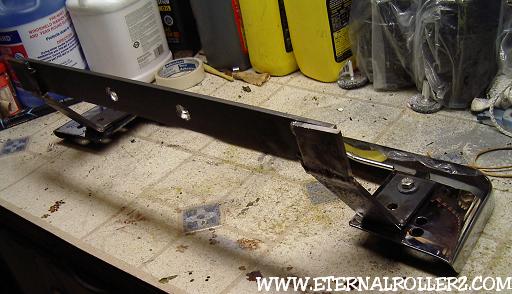
STEP 7: Supporting The Rim With A Bracket
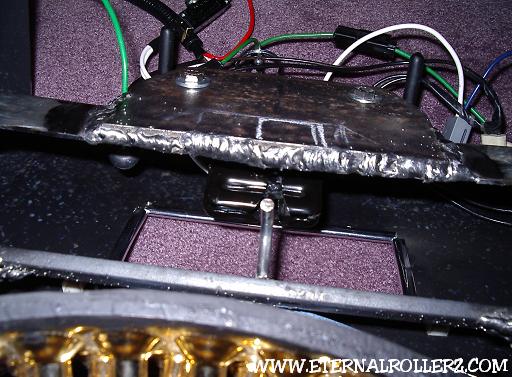
This part is the most important part of the kit and the second hardest step to do. The rim bracket is needed to keep the rim secure in the kit. This bracket is designed to bolt in using grade 8 bolts and hardware. The bracket is made from 1/4" x 2" flat bar steel stock. On this kit we used a 20" long flat bar to mount to the rim adapter. Two small parts were made up and holes were drilled in them to bolt to the top bucket. Two more parts connect the bolting brackets to the rim support bar. The tricky part was spot welding everything together. We did a mock up of the bracket inside the kit. We laid a water soaked towel in the top shell to prevent damage when spot welding the bracket in place. Once everything was in place the bracket was taken out and the welds were finished up. Note: You may have a hard time getting the bracket out of the kit. We ended up drilling out the bottom rivets in the top shell to get the bracket out.
Above: This bracket was made from five parts.
Above: The bracket was mounted to the top bucket just to illustrate how it works.
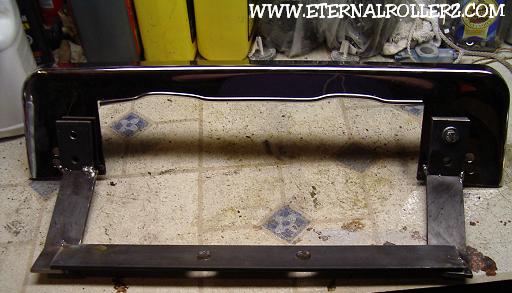
Above: The bracket is spot welded together and the welds will need to be finished up.
STEP 8: Paint Top
The top gets sanded and painted to match the car. You could also cover the top shell in vinyl or a canvas covering.
Above: The top shell is ready for the rim after paint.
STEP 9: Mount The Rim In Shell
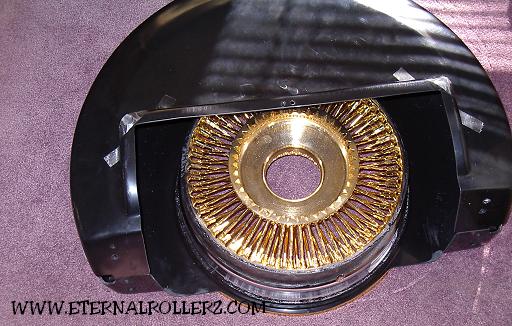
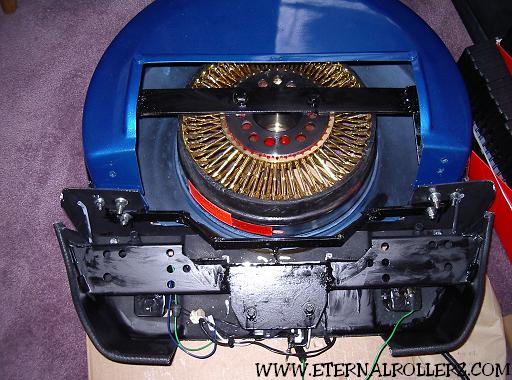
This step can be a bit tricky but if you have someone to lend an extra hand it's not so bad. Lay a clean towel on a flat table. Place the rim on the table face down then put the top shell on the rim face down. The top shell must have the bracket inside it at this point. Now bolt in the bracket to the rim adapter. Using grade 8 bolts attach the bucket top to the top shell and the rim bracket. Carefully reinstall the trim ring around the kit trying not to damage the paint on the shell. Once the top of the kit is together put it right side up and make sure the rim lip is tight all the way around the shell face.
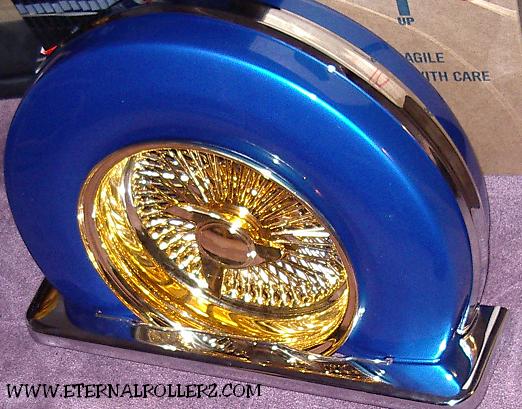
Above: Here is the kit on the table with all the bolts installed.

Above: Here is the kit as it would be seen on the back of the car.
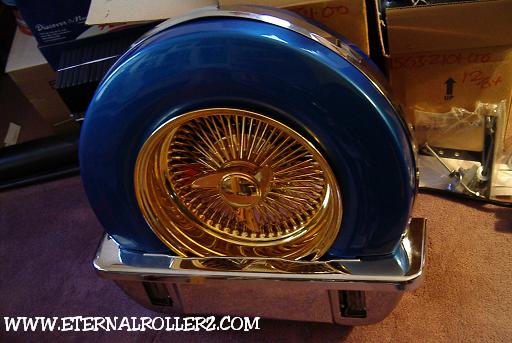
Above: The top part of this kit is almost finished.
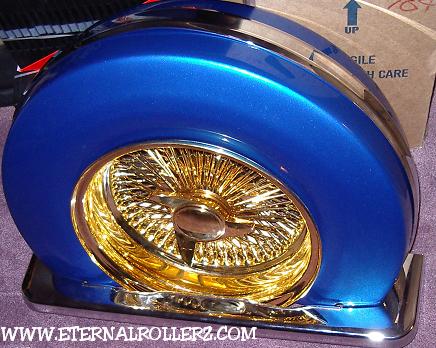
Above: Another shot of the almost finished top.
STEP 10 : Modifying The Lower Bucket
Now it is time to start working on the lower bucket of the kit. The problem is that the latch and bracket are in the way of the rim. Room must be made for the rim to sit into the lower bucket. We must modify the original latch and remove it. We will install the latch in another part of the kit later. A Dremel tool works great for this step.
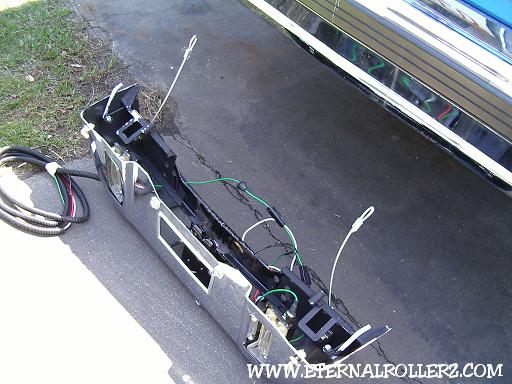
Above: The latch was unbolted and taken off. Then the latch bracket is cut off giving the rim clearance to sit in the lower bucket correctly.
Above: We attached the top to the lower bucket just to check how it will fit together. At this point we are trying to figure out how to remount the latch since space is limited.
Above: Here is the kit as it would be seen from the back of the car. Make sure your kit sits together nicely.
STEP 11 : Installing The Latch
NOTE: INSTALLING THE LATCH THIS WAY WAS AN EXPERIMENT AND WE RECOMMEND FINDING AN ALTERNATIVE METHOD SUCH AS MOUNTING THE LATCH ON THE BUMPER.
This step was the hardest step to do. The latch we wanted hidden and not on the bumper. That meant that the latch had to be in the lower bucket. They're many different ways to do this step but here is how we did our latch. In addition to this latch we will have a system of safety wire to limit the amount of tilt the kit can open when filling up and another safety for hitting some serious switches by taking stress off the latch. Note: We are not responsible for damages or injuries from the suggestions on this page. Remember safety first!

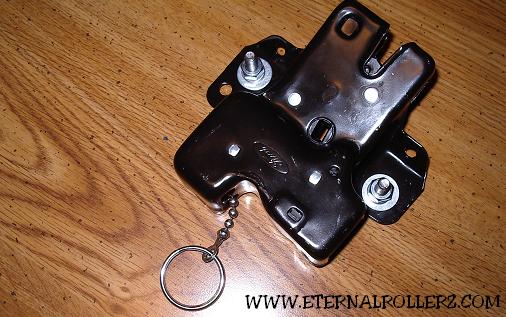
Above: The latch used on E&G spare kits are a Ford trunk latch.
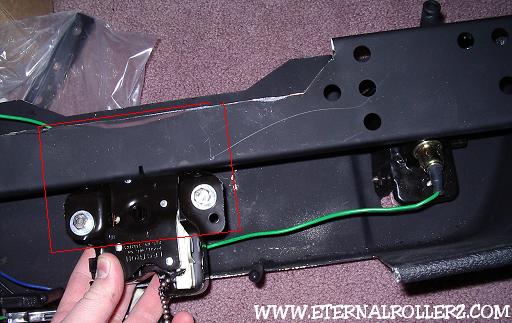
Above: Here is how the latch will mount. You will have to shave away the lip on the cross bar for the head of the latch to fit. The red square is where the latch plate made from 1/4" steel will weld to the cross bar of the kit.
Above: Here is latch plate held in with clamps.
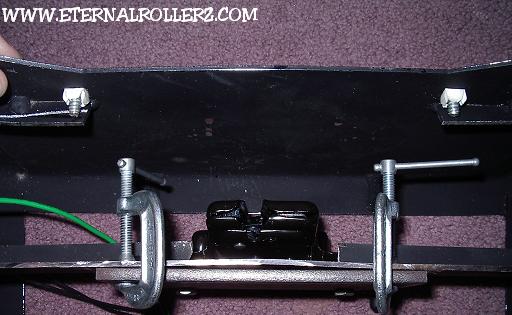
Above: Here is another angle of the latch mounted to the clamped in latch plate. Note the notch in kit cross bar for latch head.

Above: This is a aluminum test part that we made out of 1"x 1/4" steel flat bar once we get it " just right. "
Above: In this picture you can see the test bar. A red line shows how the bar sits. The finished steel bar will mount to the bucket top of the top shell.
Above: The links on the latch release were cut down because the latch is going to be mounted in the bottom of the kit.
Above: The top part of the latch has been made from steel.
Above: The steel latch plate has been welded. It was to small of a area when closed to finish the latching mechanism.
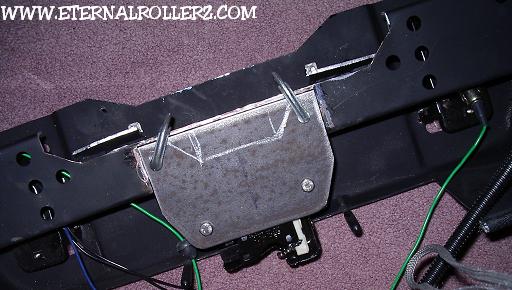
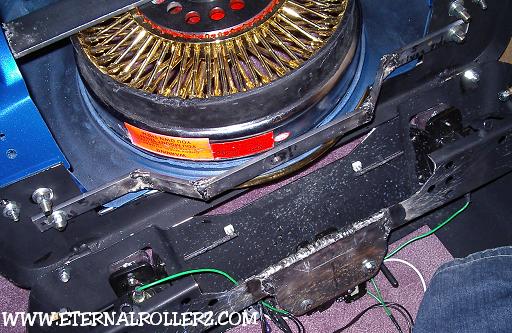
Above: Using a Dremel tool we cut through the lower bucket where the license plate will hide things.
Above: Before we cut the hole we laid down masking tape to protect the chrome. The finished hole got door edge molding on the cut edges.
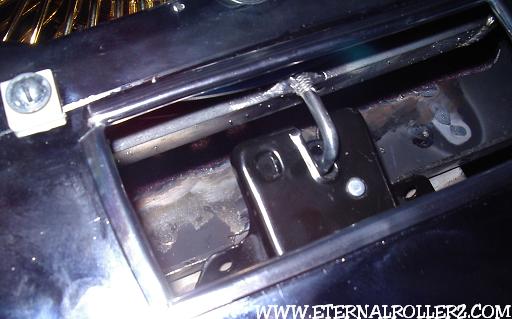
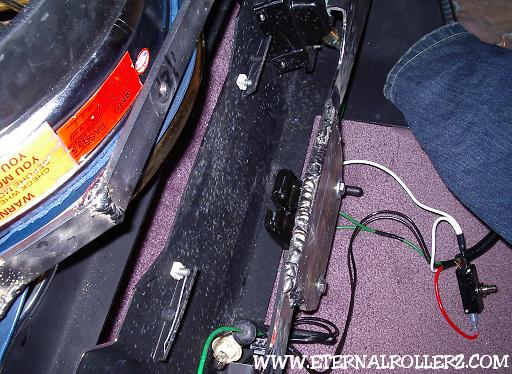
Above: From this hole it made it easy to line everything up. The latch was moved up some more then we made a "J" hook for the latch. We marked the metal and took out the top latch bar. We then welded the "J" hook to the top latch bar and remounted our hardware.
Above: Here is the "J" hook, you can see it lines up perfectly. You can use pliers and a little bit of elbow grease if it needs to be adjusted a bit.
Above: Flat black paint has been brushed onto the bare metal we added to the kit.
STEP 12 : Installing the Kit On Car
You will need a tape measure, masking tape, drill, tools, Dremel tool with cutting wheel and a few other things. It is easy if you have someone lending an extra hand to hold things.
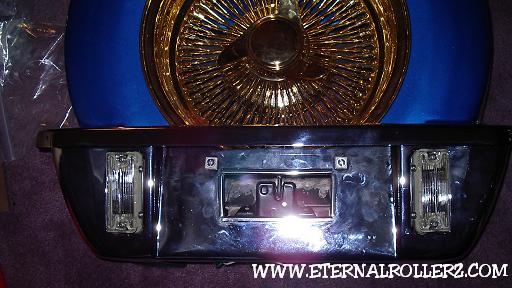
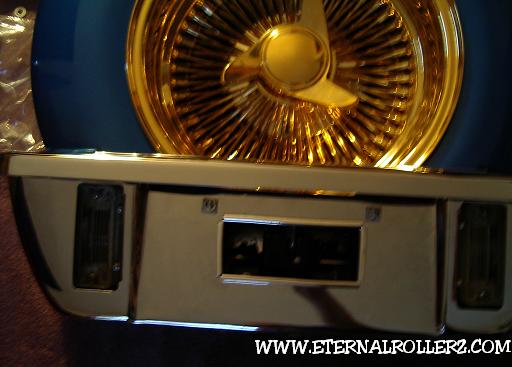
Above: The lower bucket is checked against the bumper for fit. This kit was ordered for this car so it fit the lines of the bumper with no trimming.
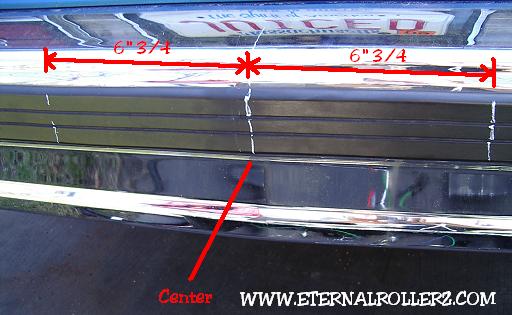
Above: You must find the center of the bumper. This E&G kit required us to mark two lines out 6" 3/4 away from the center. Holes were drilled for the bolts.
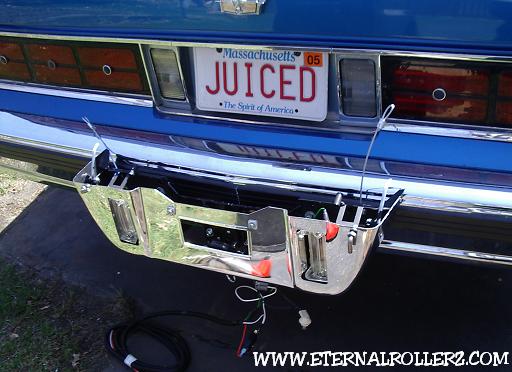
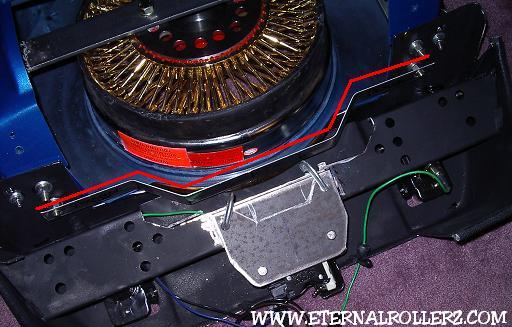
Above: The lower bucket is mounted with two bolts through the bumper and one on the bracket below. Note the two safety cables to attach to the top of the kit. The cables keep it from opening all the way and prevents damage.
Above: The top part of the kit is attached and the bolts are tightened. The cables are attached at this point to the top of the kit. You can also see this car is in need of a bath.
Above: The kit wouldn't close and latch so we had to notch the bumper on this car so the rim wasn't in the way..

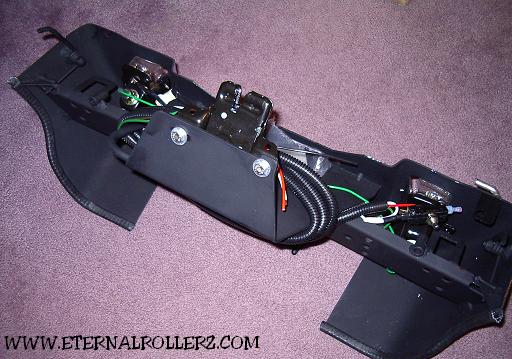
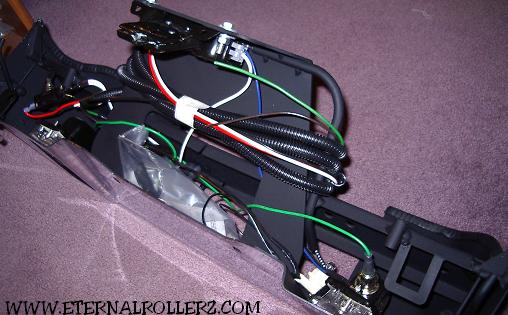
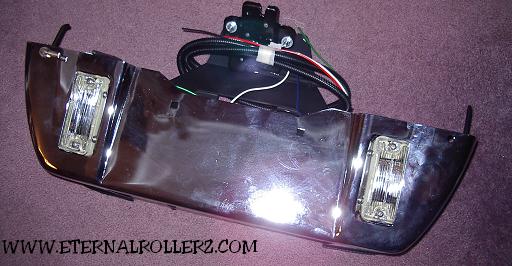
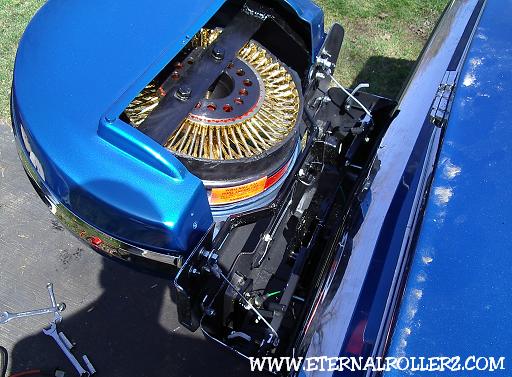
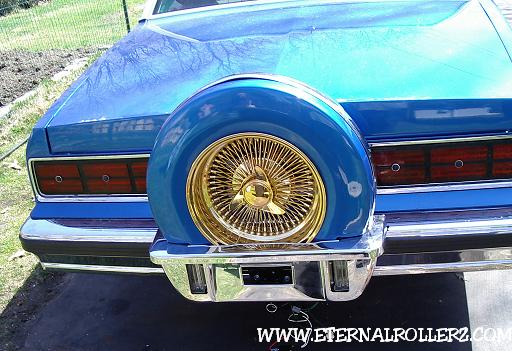
Above: The kit is on and wired. It needs to be adjusted but other than that it came out pretty darn good.
All Photographs and Art Copyright ©
1998-2005 Eternal Rollerz C.C.
Website Design Copyright © 1998-2005 Webmaster