Circus Car Build: A Close Look
Warning: Any car flying violently into the air can be dangerous and it can be dangerous to any people around. Never allow anyone or yourself to get too close to a car when it's hopping. NEVER get under or allow anyone to get under a car that is "stuck" not matter how stable it seems.
Before we get started just to clarify a few things with some definitions:
Radical Hopper: A hopper that has a extremely exaggerated rear lift to allow the car to hop higher without hitting the rear bumper to soon.
Monster Hopper: Another name for a Radical hopper.
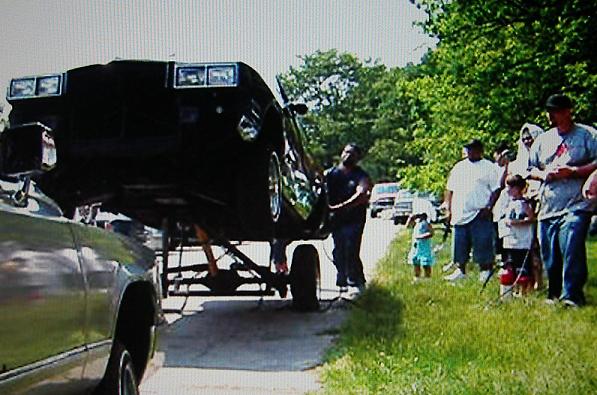
Circus Car: Sometimes used as a name for a Radical Hopper that was inexpensively put together, typically has body damage, missing front bumpers and sometimes missing the header panel. This term is reference to the grossly extended control arms in the from and strange position of the rear wheels making the car look non production. It is common for a circus car to get "stuck" on the rear bumper.
Lowriders looking to reach for the sky became innovative in turning inexpensive cars into monster hoppers. This division of lowriding has evolved to a point where many car clubs have put together these cars to hop, saving their more expensive show cars from the abuse of hopping. Radical hoppers and circus cars are often not understood by fellow lowriders, this is because radical hoppers and especially circus cars tend not to be as nice as a show car. From time to time some builders have put together some nice show worthy radicals.
Another interesting point of view coming from those who dislike these cars is they say that it's easy to get a car up that high when hopping. They seem to lack a understanding about the amount of work that goes into these hoppers and what it really takes to get a car off the ground like that. There is much more involved than counter weight like some may have you believe. Other factors like center of balance, suspension geometry, rim and tire selection, spring selection, pump selection, dump selection, extensive metal fabrication and more are involved. It's easier to build a street car than a monster hopper.
If you are interested in lowriding's subculture of radical hoppers Truucha Lowrider Videos capture the action all on film.
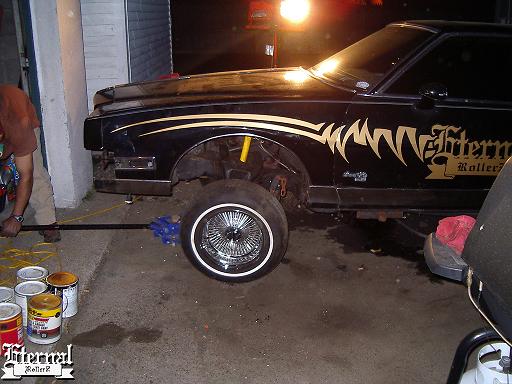
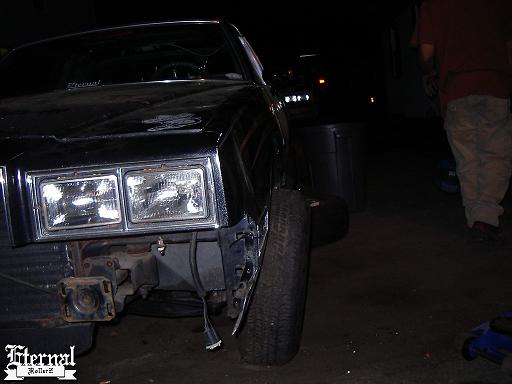
Above: Here is a circus car.
Car Selection
Most popular cars to turn into circus cars tend to be G-Body cars ( Monte Carlo, Cutlass, Regal and Grand Prix ) because of their low cost and being easy to find. Sometimes Caprices and Cadillacs are used because of their long wheel base that gives the advantage of added height when hopping. It is easy to find a cheap car to use as a radical hopper. Make sure the frame is solid to start with and that all body mounts seem solid. It really helps if the car is running order because it's not fun (or safe) to push a radical hopper on a trailer.
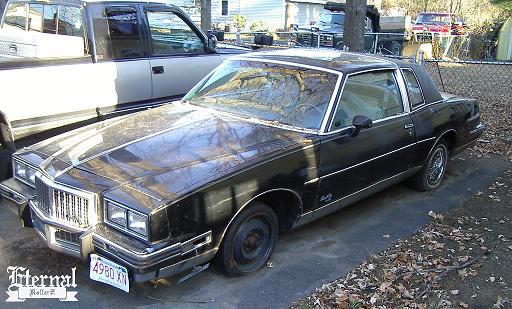
Above: This car is a great foundation to build a circus car.
Car Preparation
Once you get the car home or to the shop it's time to prep your ride for it transformation. It may be a good idea to remove the interior, empty out the trunk and make sure everything is fairly clean. You may want to remove parts under the hood that are not needed to run. This may help with making the front end of the car lighter. Also in this step it would be a good idea to take measurement for the battery rack. The front end is usually torn down in this stage as well.
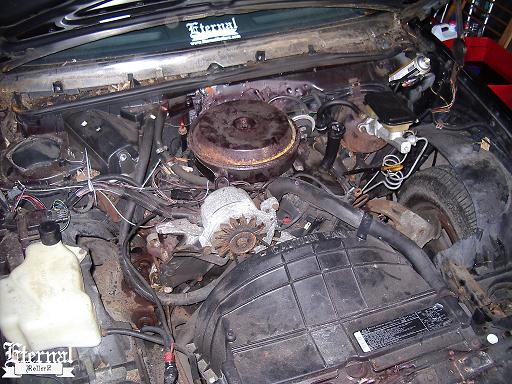
Above: Anything not being used by the engine to run is removed.
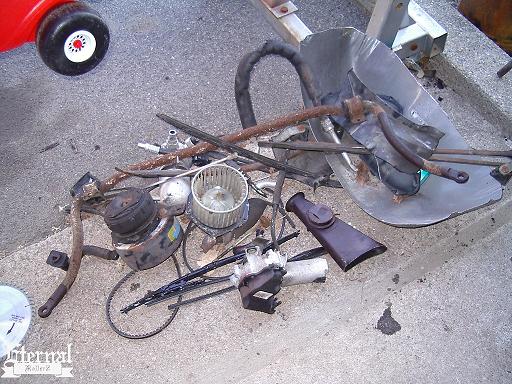
Above: To help lighten the car this pile of junk was removed. (Even though the weight is probably insignificant.)
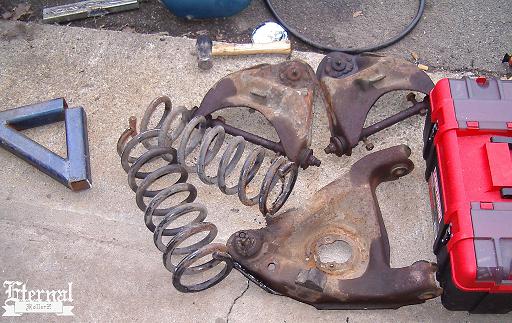
Above: The front end is disassembled so work can start on the frame and control arms.
Control Arm Modifications
One of the first things you may find yourself doing on a radical is pulling off the control arms to modify them. Upper control arms are extended and lowers are always boxed in to prevent the spring from pushing through the bottom. Determining how much the upper control arms are extended is determined on modifications to the lower control arms. On a car with no extension of the lower control arms the uppers should be extended about one inch. If the lower control arms are extended then the uppers should be set up to compensate for it.
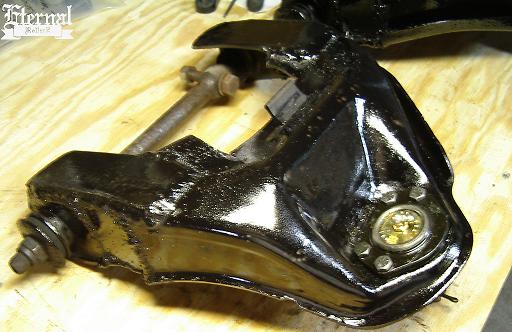
Above: A G-Body upper control arm lengthened two inches. (Because 1 inch extended lowers are being installed as well.)
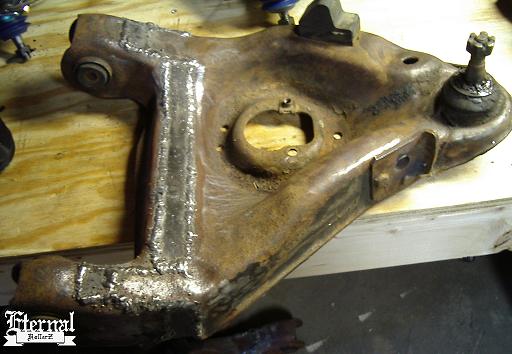
Above: A G-Body lower control arm lengthened one inch for better hop and spring position. Don't forget to grind down all your welds and box the control arm from the bottom. The stock spring pocket depth is is fin with extended lowers.
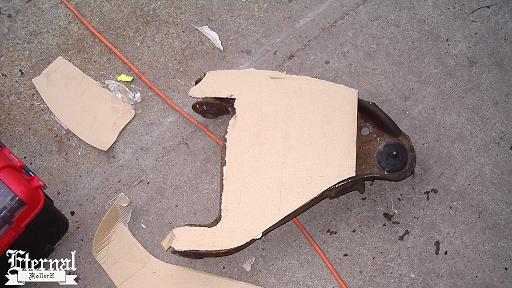
Above: Cardboard templates are made for the lower control arm reinforcement.
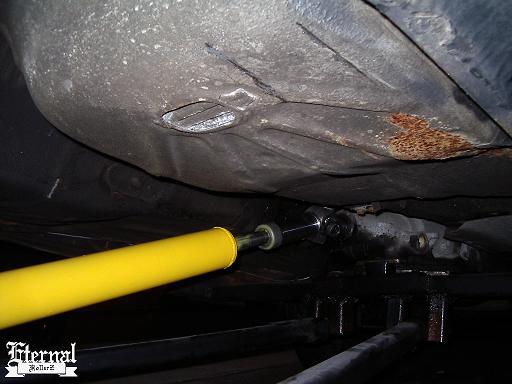
Spindle Swap
If you own a G-Body swapping the front spindles for a set of B-Body (Caprice, Impala, Roadmaster.. ect..) spindles is a good option to improve the front lock up (Coil travel) and help with the issue of hitting the front bumper when the rear is locked up.
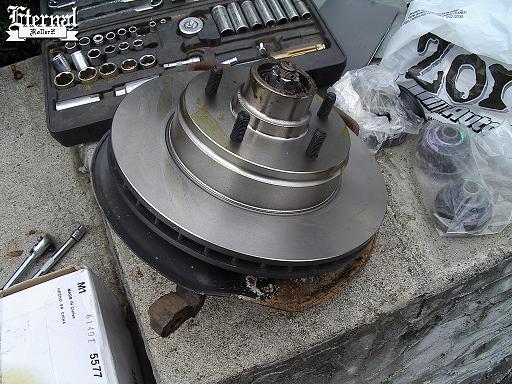
Above: Here is a set of B-Body spindles and rotors.
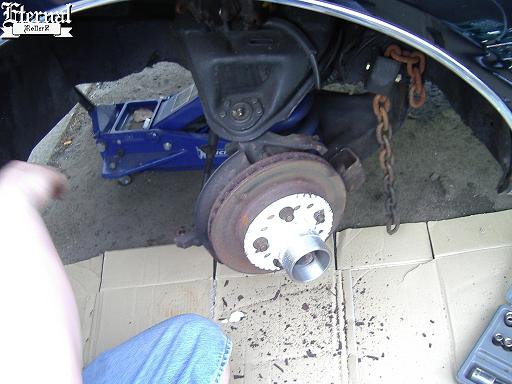
Above: Before B-Body spindles are put on G-Body.
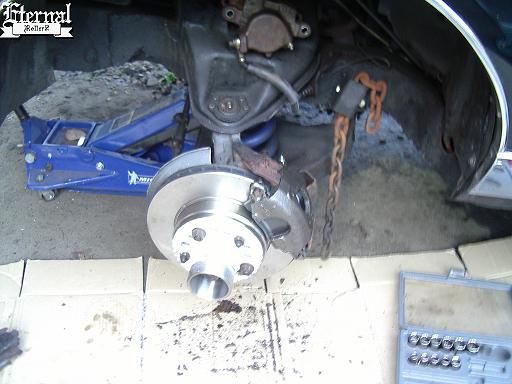
Above: After B-Body spindles are put on G-Body.
Above: Notice how high front lock up is after installing the B-Body spindles on a G-Body.
Above: The wheels stick out now.
Frame & Body Reinforcement
The key to building a good hopper of any kind is a reinforced frame. Not only does a reinforced frame ensure the car won't fall apart but it also puts all the energy of bouncing to the coils instead of a weak flexing frame that will take away from the hop.
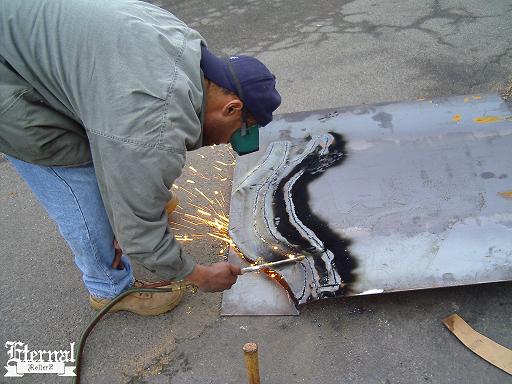
Above: Templates are made and traced onto a steel sheet and cut out.
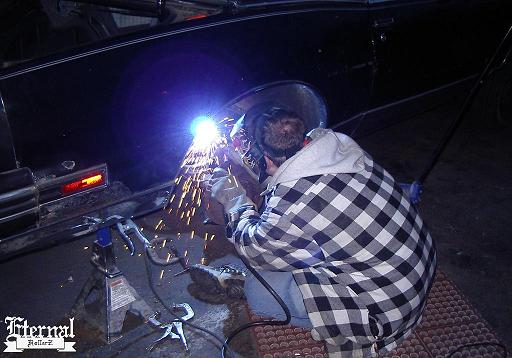
Above: Reinforcing the frame.
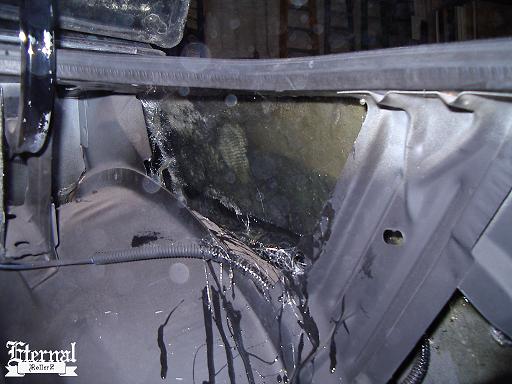
Above: The rear body panels get fiberglass reinforcements.
Rear Trailing Arm Lift Type
You have four choices for the type or rear suspension you can use on a radical hopper. Here are the four different types of rear lift:
Dropped Mounts:
This type of rear suspension uses the stock trailing arms but the original mounts
have been dropped towards the ground a few inches. This works great with cars
using 14 inch and up rear cylinders. The lift created is higher than stock and
it allows the rear wheels to move towards the front of the car with small cylinders.
Remember that the car will not sit as low as it used to. You may need to get
large springs for the rear depending on how much of a drop you do on the mounts.
Advantages: Easy to fabricate brackets, High lift on smaller cylinders, excellent
rear wheel position when locked up, works good on street car. Disadvantages:
The car can't sit too low in the rear.
Custom Four Link:
This type of rear suspension looks similar to the stock four link suspension
of most GM cars but the trailing arms are longer than stock. Also the mounts
for the trailing arms have been moved or re-fabricated. Advantages: High lift
in the rear, excellent rear wheel position when locked up, The car can still
do side to side on the rear if the suspension was carefully planned, works good
on street car. Disadvantages: More difficult to fabricate, measure and plan
out.
Long Bar:
A long bar type rear suspension is great for cars using huge rear cylinders.
A cross member is typically made where the original transmission cross member
was located. The cross member will have mounts for the long bars to hinge to.
Two long bars go from the newly constructed cross member to the rear axle. The
short trailing arms are welded to the long bar on each side to permanently hold
the pinion angle of the rear axle in the desired position. Crossed chains provide
the most stability when the car is locked up in the rear. Advantages: Easy to
fabricate and strong. Disadvantages: This type of setup needs lots of cylinder
lift before the rear wheels start to shift forward. This type of setup isn't
very good on a car that gets driven often.
Reversed: This type of rear suspension is used on cars that get "stuck" on the rear bumper. Once the car is sitting on the bumper the switchman can hit a switch to continue to open the rear up until the car is straight up in the air or keep going until the car flips.
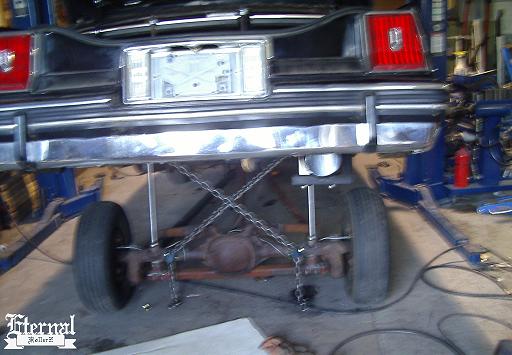
Above: A long bar type rear suspension was chosen for this car.
Front Bumper?
If you have more than 45+ inches of lift under your rear bumper you may end up having to take your front bumper off. This is because the rear lift is too high to allow the front to land without hitting the front bumper. The easiest and cheapest fix for this is to remove the front bumper. Other tricks such as 2 inch lift spindles from a two wheel drive Chevrolet S-10 pick up will fit a G-Body perfectly and allow more clearance up front. Another trick of using 80's caprice spindles may help as it gives room for bigger coils and improved lock up however if you are off on the switch you may smash the front on the ground.
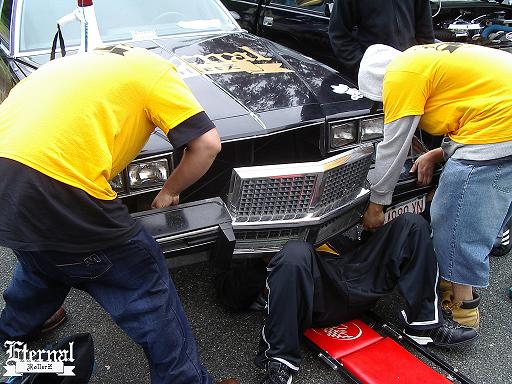
Above: Removing the front bumper after hitting the ground at full rear lock up. (Note: This was on standard G-Body spindles at the time.)
Setup Selection
At at minimum at least 12 batteries should be used (The more the better!) and they should be places as close to the rear of the car as possible. You can use a single or double pump tot he nose. A piston pump would be recommended for a single pump setup. 72-96 Volts can used to the front pump(s). You can use one or two rear pumps. If you use a single pump to control the rear remember that you may need to make a custom reservoir tank for the rear pump because of the long rear cylinder. The less angle fittings in the front plumbing the better and most importantly use at least 1/2 check valves with a good square dump like an Adex valve. A slow down valve is optional depending on the switchman's preferences. Avoid using a x-block on a double pump setup, it is better to run separate lines with separate dumps on a double pump.
Rim and Tire Selection
Most radical hoppers choose to use bigger rims such as 14's and 15's. The tires tend to be oversized compared to the typical tire choices lowriders like. Tire pressure in the front may vary from 60 - 80PSI, rear tire pressure may take some experimentation because if over inflated the car may bounce in the rear when hopping the front. This rear bounce is detrimental to getting a good hop out of your radical hopper. Watch some Truucha Lowrider videos you may notice that on some radical hoppers the rear rims are a size smaller than the front.
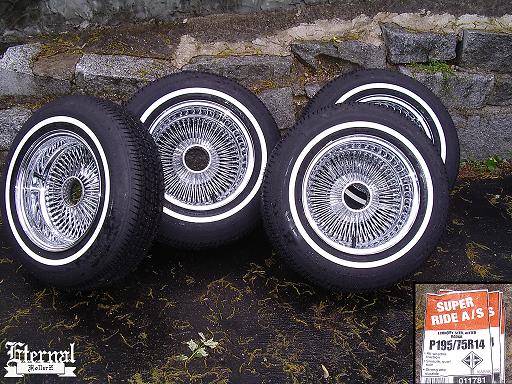
Above: Nice large 195-75-14 radial tires were used and filled to 60 PSI.
Weight?
Note: This section is not a reflection of our car club's view on weight.
This may be a controversial subject since adding weight is typically frowned upon and not allowed in professional sanctioned events. A radical hopper will need some counter weight to overcome the point of balance. There are two types of weight, legal weight and illegal weight. This refers to if the weight would be allowed at a sanctioned event. Typical legal weight includes heavy rack materials, batteries, and frame reinforcement. Illegal weight includes any type of added weight such as sand, steel or lead that has no other purpose but to act as a counter weight. On some cars the rear of the frame is filled with sand, the bumpers are filled with lead, thick steel plates are added under the battery trays, the rack box tubing is filled with extra weight and even dummy batteries are filled with lead. On the street anything goes, but don't even think about it if you compete at shows. Many hop judges are very thorough at checking the cars. Inspection at a show may include looking over the rack, weighing batteries, and looking for other other places weight may be hidden.
A car with poorly calculated added weight will easily get "stuck" on the rear bumper after several small low hops. If illegal weight is added it should be done in small increments to avoid getting "stuck" and to avoid a slow floating hop. Lead is the number one choice for added illegal weight because of it's weight to mass ratio allowing for more lead. Lead can also be melted to allow it to fit into places where it can be easily hidden. If you are working with lead remember that it is poisonous and it's vapors should be avoided if you are melting it down. Lead is also dangerous when melted because it can splash and cause severe burns to the skin and possibly your eyes.
Switchman
Believe it or not this is the single most important factor in the performance of the car you build. A good switchman can make a big difference. Timing is everything especially with how quick square dump valves can close. Anyone who holds the switch up too long or hold the dump open for long periods of time is going to be a costly switchman. Damage can result from over locking the pumps and the dump can overheat if held too long. A good switch man remains calm under pressure and always knows when to call it quits.
Accessories
Sometimes add on are over looked for your hopper. Never forget to have a slip yoke drive shaft made for your hopper.
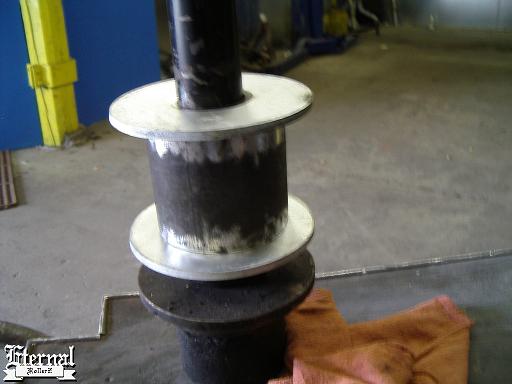
Above: Special rear lift collars were made to lift the rear suspension an additional four inches.
Above: A slip yoke drive shaft is a must when dealing with a radical rear lock up
All Photographs and Art Copyright
© 1998-2007 Eternal Rollerz C.C.
Website Design Copyright © 1998-2007 Webmaster